How to Clean Handbag Interior for a Fresh Look

Before you even think about tackling that mystery stain, let's get your cleaning toolkit in order. The secret to a successful and safe handbag refresh is having the right supplies ready to go.
It’s just like cooking—prep is everything. Having your tools on hand stops you from scrambling mid-clean and grabbing something harsh (like a kitchen sponge or Windex) that could do more harm than good.
Gathering Your Handbag Cleaning Toolkit
The Absolute Essentials
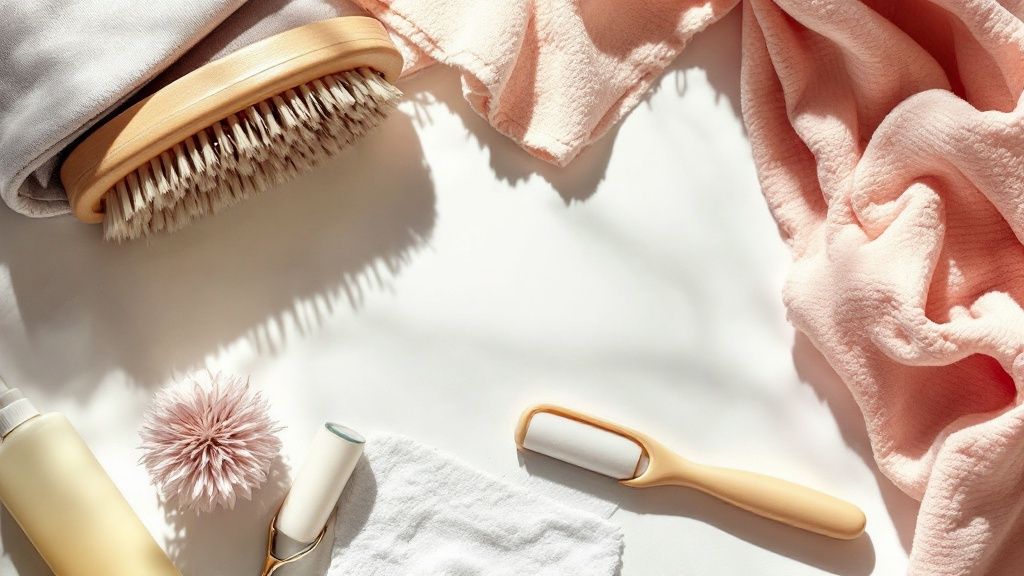
No matter what kind of bag you’re working with, some tools are simply non-negotiable. These are the gentle giants of your cleaning arsenal, effective for general maintenance on almost any material.
- Microfiber Cloths: Their soft, non-abrasive texture is a lifesaver. They wipe down surfaces without leaving behind lint or creating tiny scratches.
- A Soft-Bristled Brush: Think of a clean makeup brush or a super-soft toothbrush. This is perfect for gently coaxing out stubborn crumbs and dust from those hard-to-reach corners and seams.
- Cotton Swabs: These are your precision tools. Use them to target tiny stains or clean carefully along delicate stitching where a cloth just can’t get.
Choosing the Right Cleaners
This is where things get specific. Using the wrong cleaner is a fast track to a ruined lining, so it’s crucial to match the solution to the material. A one-size-fits-all approach is a recipe for disaster.
For fabric-lined bags, you can often get away with a simple mixture of a mild, clear soap (like baby shampoo) and distilled water. Using distilled water is a pro tip—it prevents the mineral deposits found in regular tap water from leaving behind those annoying water spots as the lining dries.
Leather interiors, however, are a different story. They need a dedicated, pH-balanced leather cleaner. This cleans the material without stripping its natural oils, which is what prevents it from drying out, cracking, and discoloring over time.
Before you start, it's a good idea to lay everything out. Here’s a quick-reference table to make sure you have what you need.
Essential Supplies for Cleaning Your Handbag Interior
| Supply Item | Purpose | Best For |
|---|---|---|
| Microfiber Cloths | Wiping down surfaces, applying cleaner | All lining types |
| Soft-Bristled Brush | Loosening dirt and debris from corners | Fabric and leather linings |
| Cotton Swabs | Precision spot cleaning, detail work | All lining types |
| Mild, Clear Soap | Creating a gentle cleaning solution | Fabric linings |
| Distilled Water | Mixing with soap, preventing mineral spots | Fabric linings |
| Leather Cleaner | Safely cleaning without stripping oils | Leather linings |
With these items ready, you’re set up for a safe and effective cleaning session that will leave your bag looking its best from the inside out.
Did you know that a surprising amount of handbag damage—roughly 60% to 70%—is linked to neglecting the interior? Spilled makeup, forgotten snacks, and leaky pens create a breeding ground for bacteria that breaks down the material.
This is exactly why routine care is so important. Most professional handbag maintenance recommendations suggest a deep clean every 6 to 12 months for bags you use daily. It’s a small bit of effort that makes a huge difference in how long your favorite accessory will last.
The Prep Work for a Spotless Interior
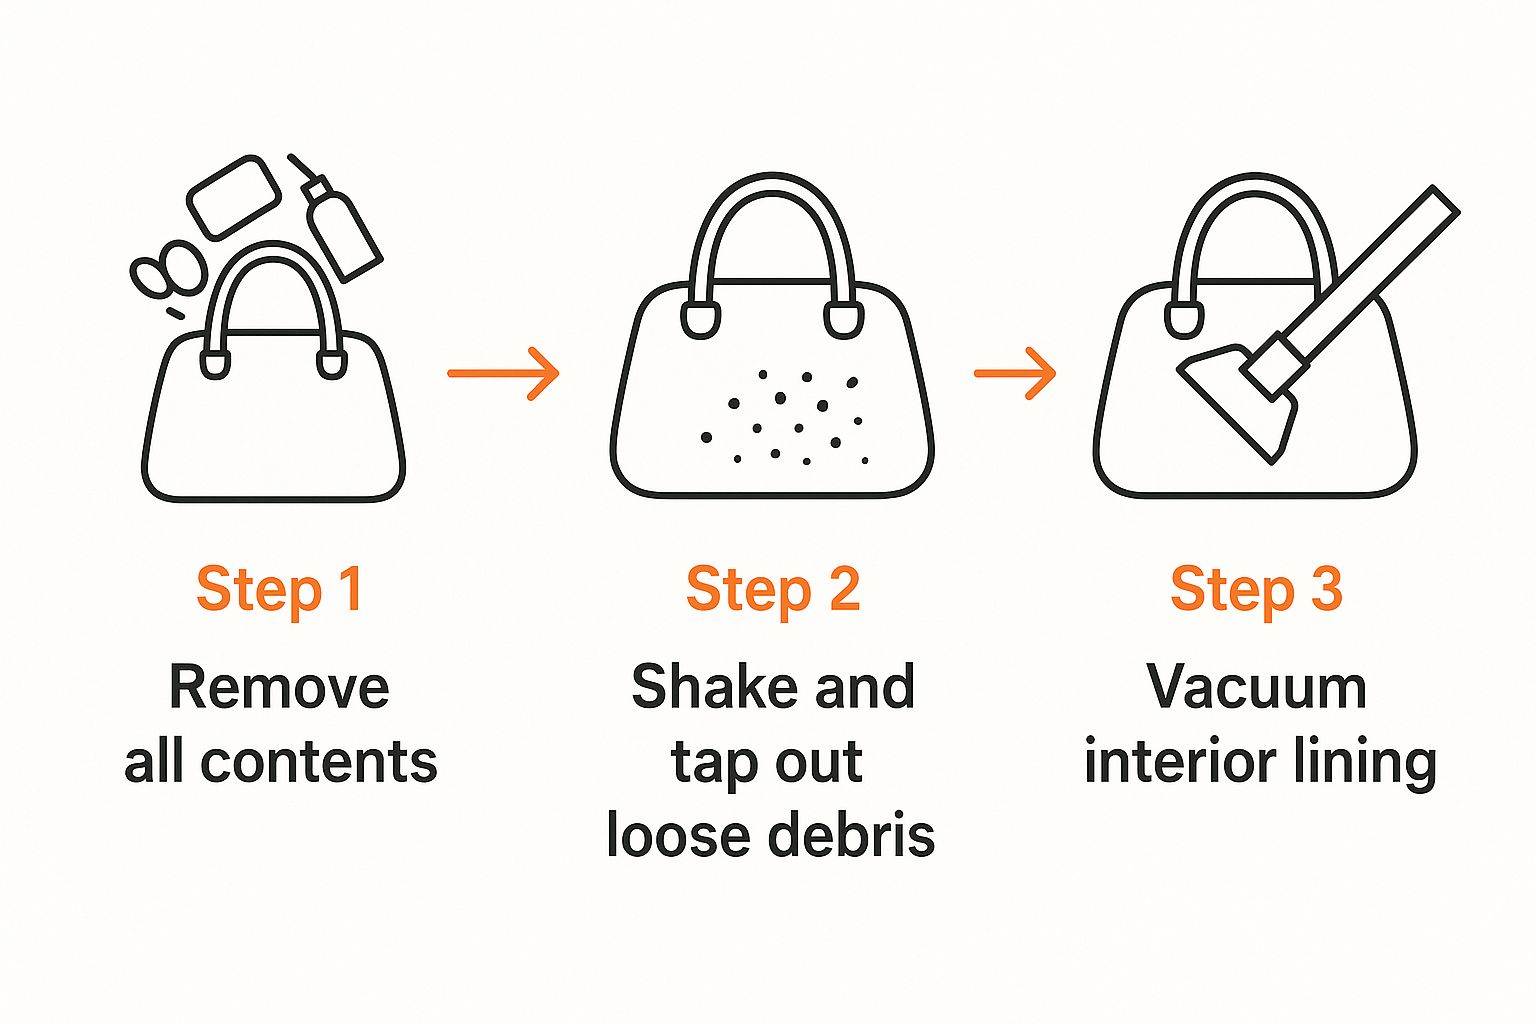
Before you even think about grabbing a cleaning solution, you’ve got to do the prep work. This first step is absolutely non-negotiable. It’s what sets the stage for a truly deep clean, making sure loose crumbs and dust don’t turn into a grimy mess later on.
First things first: completely empty your bag. I mean everything. Check every last pocket, zippered section, and hidden sleeve. You would not believe the things I’ve found hiding in the corners of bags over the years—ancient receipts, melted lip balms, and enough loose change to buy a coffee.
Getting Rid of Loose Grime and Dust
Once it’s empty, take the bag, turn it upside down, and give it a good shake over a trash can. Be gentle but firm! For the really stubborn bits, you can often pull the fabric lining partially out of the bag—just don't force it.
Taking these few moments ensures you’re starting with a clean slate, which makes all the next steps so much more effective.
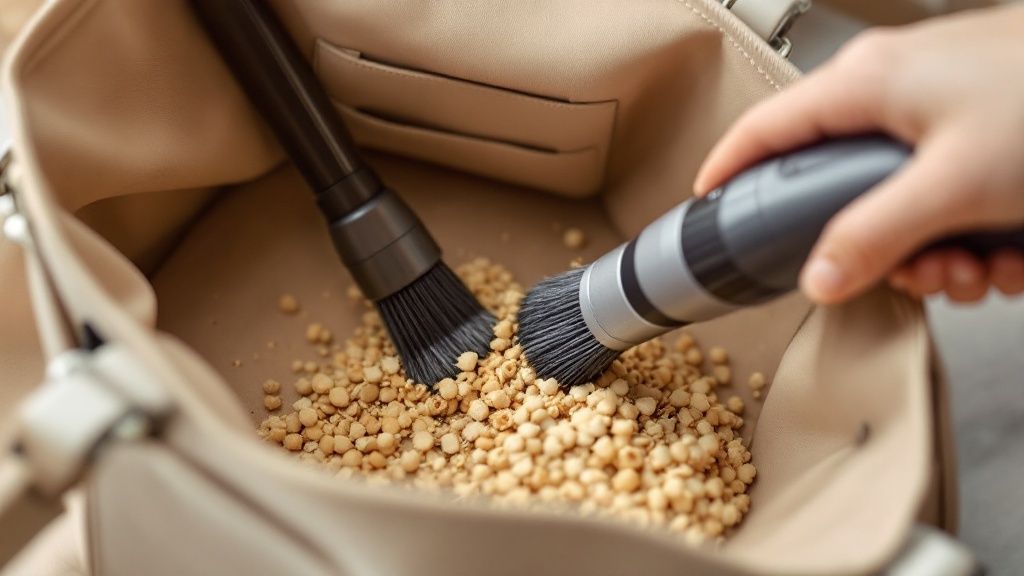
Now, let's tackle the finer particles. A small handheld vacuum with a soft brush attachment is a lifesaver for fabric interiors, as it gently lifts dust right out of the weave. If you don't have one, a good quality lint roller works wonders, too. It’s perfect for picking up lint, stray hairs, and any crumbs that refuse to leave.
This isn’t just about being tidy. Think about it: the inside of a handbag can sometimes harbor more bacteria than you’d want to know, often fed by those forgotten crumbs and residues. Getting all that surface-level grime out first is absolutely key.
Before you start the actual cleaning, it's also a smart idea to brush up on common upholstery cleaning mistakes to avoid. The last thing you want is to accidentally damage your bag's beautiful interior.
Cleaning Fabric Linings and Common Stains
The fabric interior of a handbag, whether it's a durable canvas or a soft cotton, seems to attract every bit of daily grime. Unlike leather, fabric linings soak up spills in an instant, which means a gentle touch is absolutely essential to prevent a tiny spot from becoming a giant watermark. When you're learning how to clean a handbag's fabric interior, it's all about controlled, careful cleaning.
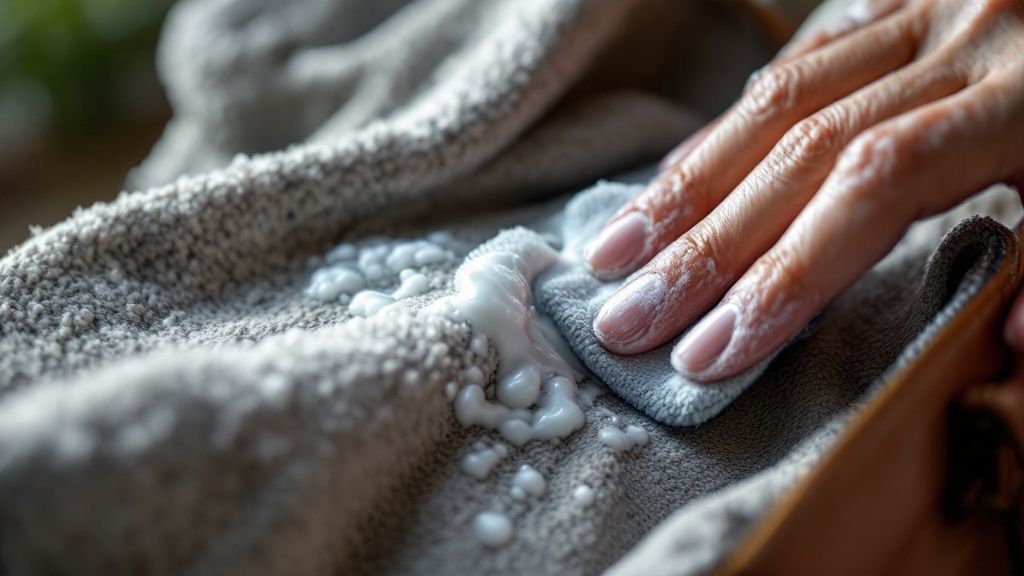
Your best cleaning solution is often the simplest one you can make. Just mix a few drops of a mild, clear soap—think baby shampoo or a gentle laundry detergent—into a small bowl of lukewarm distilled water. Give it a swirl until you see some light suds.
Next, take a corner of a microfiber cloth and dip it into your soapy water. Squeeze it out thoroughly until it's just barely damp. You never want to soak the fabric; too much moisture can lead to discoloration or even mildew down the line. Gently blot any stained areas in a dabbing motion, starting from the outside of the stain and working your way in to keep it from spreading.
Tackling Specific Everyday Stains
Life happens, and the inside of your bag usually sees the worst of it. From a leaky pen to a makeup explosion, knowing how to handle these common messes can save your favorite bag from being permanently retired.
- Ink Stains: For that dreaded pen mark, grab a cotton swab and dip it in rubbing alcohol. Carefully dab it right onto the ink. As the ink lifts, switch to a clean part of the swab to avoid smudging it around.
- Makeup Smudges: Liquid foundation and lipstick call for a different approach. Gently blot the smudge with a makeup remover wipe (always test it on a hidden spot first!) or use the mild soap solution you made earlier.
- Oily Spots: If you’re dealing with a grease or oil stain, sprinkle a little cornstarch or baking soda directly on it. Let it sit for a few hours to really absorb the oil, then gently brush it all away with a soft-bristled brush.
Pro Tip: Always, always do a spot test before putting any cleaning solution on your bag’s lining. Pick an inconspicuous area, like the inside of a pocket, apply a tiny amount, and let it dry completely to make sure it doesn’t cause any discoloration.
Aftercare for Fabric Linings
Once the stains are gone, you'll want to go over the entire lining with a clean, damp cloth to "rinse" away any leftover soap. This little step is key to preventing the fabric from feeling stiff once it dries.
Proper care is so important for all your bags, from your everyday tote to your most prized possessions. If you want more tips for your high-end accessories, you can learn how to clean designer handbags with confidence by following expert advice.
Finally, leave the bag to air dry completely. Make sure to open all the pockets and compartments to get good air circulation and ensure it dries all the way through.
A Gentle Touch for Leather and Suede Interiors
When you're dealing with a leather or suede lining, you have to switch up your game. Unlike tougher fabrics, these materials are delicate. Go in too strong, and you risk stripping out their natural oils, which leads to a dry, cracked, and discolored mess. The secret is to use products made specifically for them to keep that luxe feel.
If your bag has a leather interior, your best friend is a pH-balanced leather cleaner. Don’t just squirt it directly onto the lining! Instead, put a tiny, pea-sized dot on a clean microfiber cloth. Gently work it into the leather with soft, circular motions, focusing on one small area at a time. This gives you an even clean and keeps you from accidentally soaking the material.
After you've cleaned the leather, conditioning is a non-negotiable next step. A good leather conditioner puts back the moisture that cleaning takes away, keeping the lining soft and supple. We have a more detailed guide on how to clean leather purses that walks you through every part of the process.
Handling Delicate Suede
Suede is a whole different story. It’s famously allergic to water, so any water-based cleaners are completely off the table. Its beautiful, napped texture is also a magnet for dirt and oils, so it needs a special kind of care.
For everyday dust and light dirt, a suede brush is all you need. Gently brush the surface in one direction to lift the dirt without messing up the nap. If you have a few small scuffs or shiny spots, a suede eraser can work wonders by lifting the grime without hurting the fibers.
But for really bad stains or on a bag you’ve invested a lot in, it's smarter to call in the experts. Handing it over to professional leather dry cleaning services can save you from accidentally causing permanent damage.
It's eye-opening, but a 2021 study found that only 3% of people regularly clean their reusable bags, and that includes those with fabric linings. This can lead to a serious buildup of bacteria and mold. It’s a powerful reminder that we need to be cleaning all of our bags, inside and out, on a regular basis.
Drying and Deodorizing Your Handbag
After you've done the hard work of cleaning your bag's lining, don't rush the final step. Getting the drying process right is absolutely crucial for the long-term health of your bag. The biggest mistake I see people make is reaching for a hairdryer to speed things up.
Please, don't do it! Direct heat is the enemy of a beautiful handbag. It can warp leather, shrink delicate fabrics, and even melt the adhesives holding everything together. A little bit of patience now will save you from irreversible damage later. The absolute best and safest method is to let it air dry completely.
Proper Air-Drying Techniques
To get the best results, you need to maximize airflow. Prop your handbag open as wide as it will go. Unzip every single pocket and, if possible, gently pull the lining out and away from the bag’s interior walls. This little trick helps air circulate into every nook and cranny.
Find a spot in a well-ventilated room, but keep it away from direct sunlight or heating vents. You want to avoid any extreme temperatures that could cause the material to fade or crack. Now, just let it be for at least 24 hours. Check it periodically, but don’t even think about putting it away until it feels totally dry to the touch.
Never, ever store a handbag until you are 100% certain the interior is completely dry. Trapping even a tiny bit of moisture can create a perfect environment for mildew, which is a much bigger headache to deal with than the original stain.
Eliminating Lingering Odors
Sometimes, even after a deep clean, a faint, stubborn scent remains. Instead of reaching for a scented spray that just covers up the smell, we want a real solution that absorbs it for good.
Here are a couple of my favorite, time-tested methods:
- Baking Soda: This kitchen staple is a powerhouse for absorbing odors. You can place an open box inside your bag or, for a less messy option, pour some into a small fabric pouch. Zip the bag closed and let it sit for a day or two.
- Activated Charcoal: For really tough smells, activated charcoal bags are a game-changer. They're incredibly porous and fantastic at neutralizing persistent odors without leaving behind any scent or residue.
Following these final steps ensures all your hard work pays off, leaving you with a handbag that isn’t just clean on the inside, but is also genuinely fresh and ready for its next adventure.
Common Questions About Cleaning a Handbag Interior
Even with a solid game plan, you might still run into a few specific situations that leave you second-guessing. And when it comes to a treasured handbag, it's completely normal to want to get every detail right. Let's walk through some of the questions that come up most often.
First, how often should you really be cleaning your bag’s interior? For the bag you carry every day, a quick empty-and-wipe routine once a week is a fantastic habit. For the deeper clean we just covered, aim for every two to three months to keep grime from building up.
What about those stubborn, musty odors that even baking soda can’t seem to kick? If a funky smell is lingering after you've cleaned, try tucking a few unused tea bags inside for a day or two. They do an amazing job of absorbing moisture and smells without leaving behind a heavy, perfumed scent.
Can I Use Household Cleaners on the Lining?
This is a big one, and the short answer is almost always a hard no. Your everyday all-purpose sprays, bleach-based products, or even a simple vinegar solution are way too aggressive for the delicate materials inside a handbag.
These harsh cleaners can easily strip color from fabric linings, cause leather to dry out and crack, and ultimately weaken the fibers over time. It's always best to stick with a pH-balanced cleaner designed for leather or a gentle mix of mild soap and water for fabric. The risk of causing permanent damage with a household cleaner just isn't worth it.
Key Takeaway: If you remember only one thing, make it this: always test any cleaning product on a small, hidden area first. A corner inside a pocket is perfect. This quick check ensures it won't cause discoloration or damage before you apply it to a more visible spot.
For those truly tough stains on leather, like ink or dye transfer, a DIY approach can be tricky. Our guide on how to remove stains from leather has more targeted advice for those specific headaches. Using the right technique is everything when it comes to preserving your bag’s beautiful finish.
At The Bag Icon, we believe a beautiful handbag should bring you joy, inside and out. Explore our collection of affordable luxury and find your next perfect accessory. https://www.thebagicon.com


Comments