Dye Leather Bag: Flawless Finish Guide

Giving your favorite leather bag a completely new color can feel like a big undertaking, but it’s a project you can absolutely conquer with the right know-how. This guide is here to walk you through the entire process, turning what seems like a daunting task into a genuinely rewarding DIY project. We’ll cover everything from picking the perfect dye to applying that final, protective sealant for a finish that looks truly professional.
Giving Your Leather Bag a Bold New Look
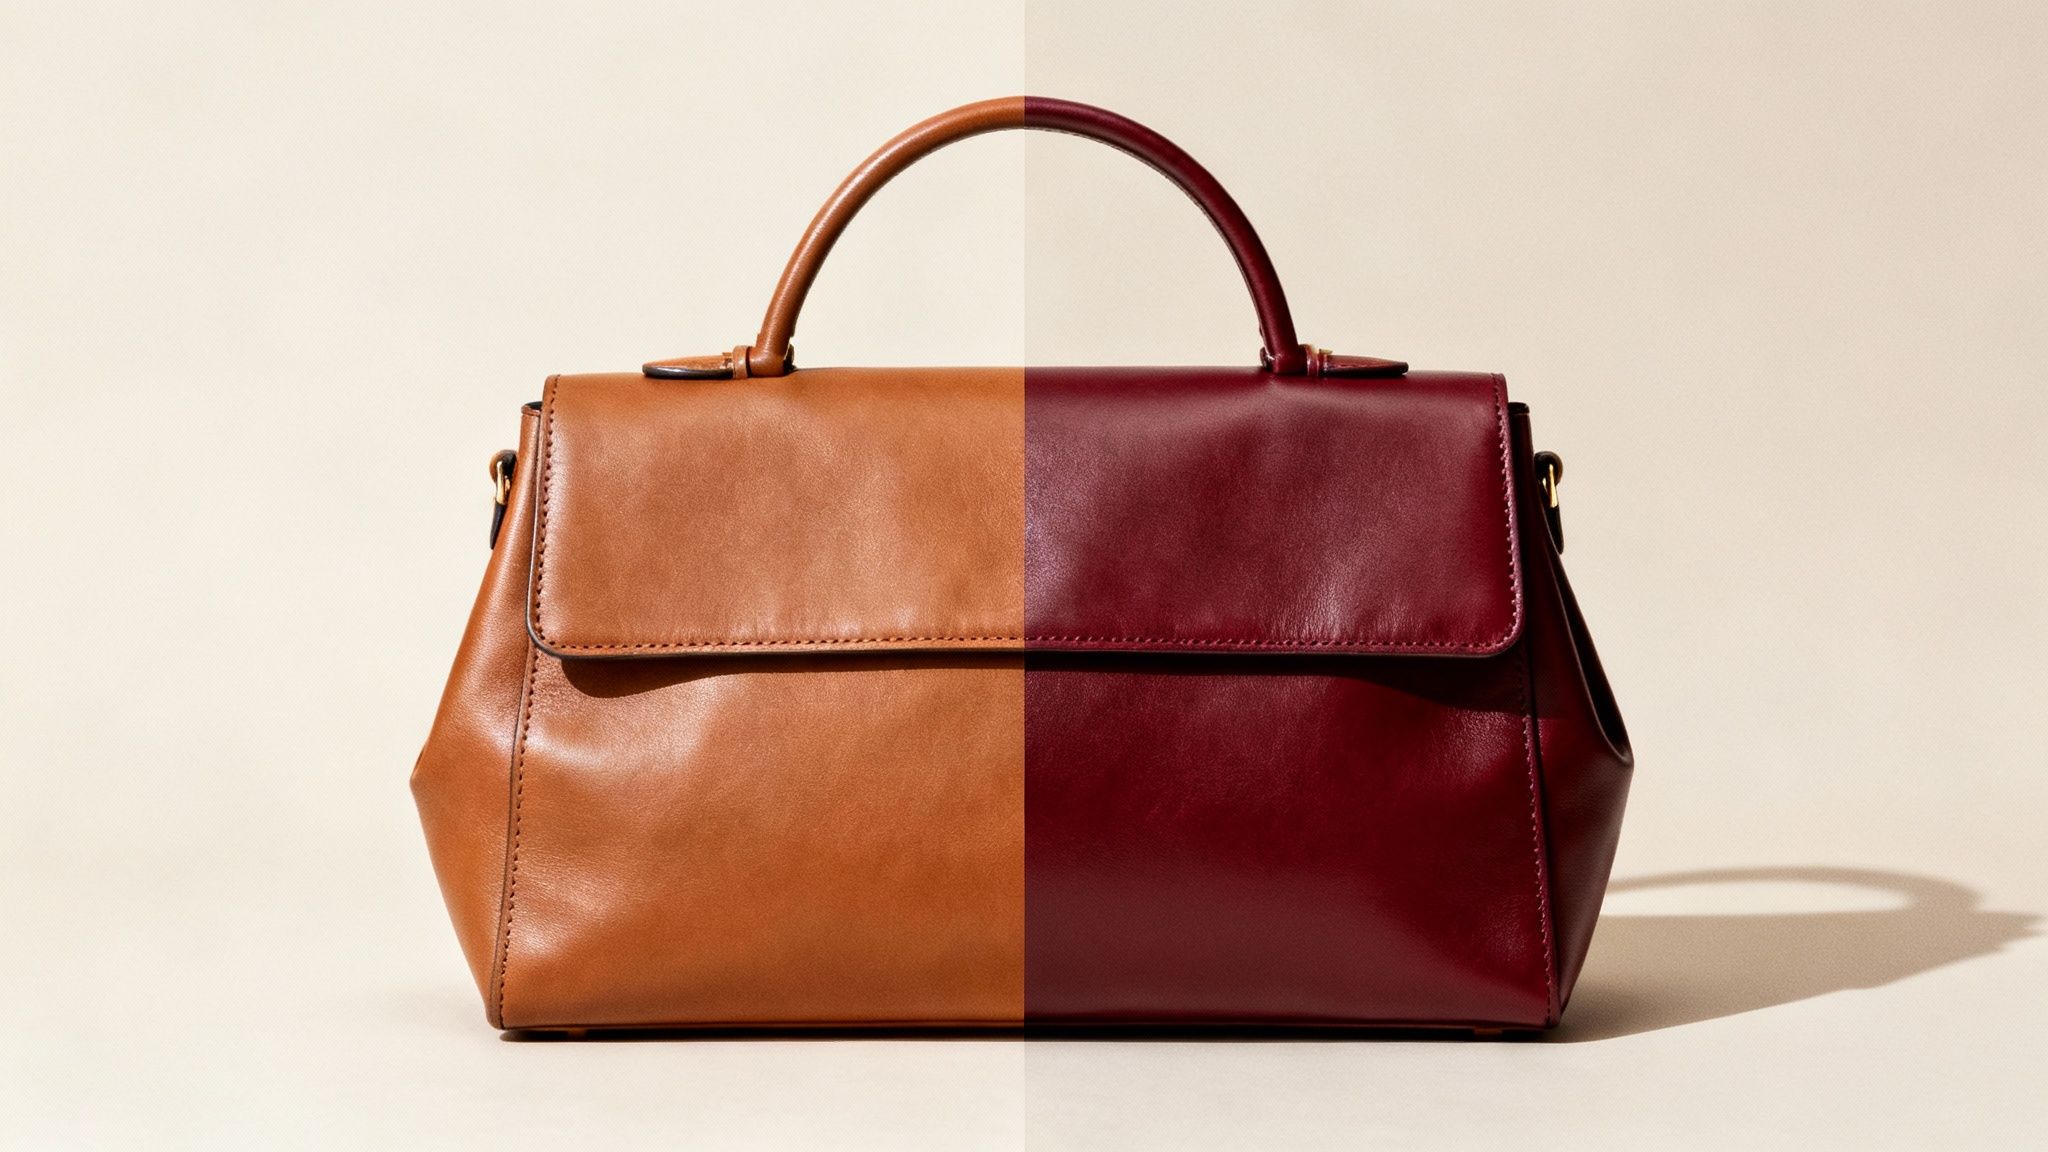
There's something incredibly satisfying about breathing new life into a well-loved accessory. Maybe you're looking to hide some scuffs on a vintage find or you’re just ready for a style change for your everyday tote. Learning how to dye a leather bag opens up so many creative doors, letting you create a custom piece that perfectly fits your style without that custom price tag.
Think of this guide as your expert companion for the journey. We'll go through every critical stage to help you sidestep common mistakes and get a result you'll be excited to show off.
- Practical Guidance: We’ll show you how to properly prep your bag so it’s ready to absorb the dye evenly—a step that beginners often overlook.
- Detailed Techniques: You’ll master the specific application methods for a smooth, even coat and learn how to avoid a splotchy, uneven finish.
- Finishing Touches: Discover how to seal your work for a durable, long-lasting color that won't rub off on your clothes.
- Brand-Specific Advice: Get essential tips if you own a premium bag, like one from The Bag Icon, including how a DIY project like this could affect your warranty.
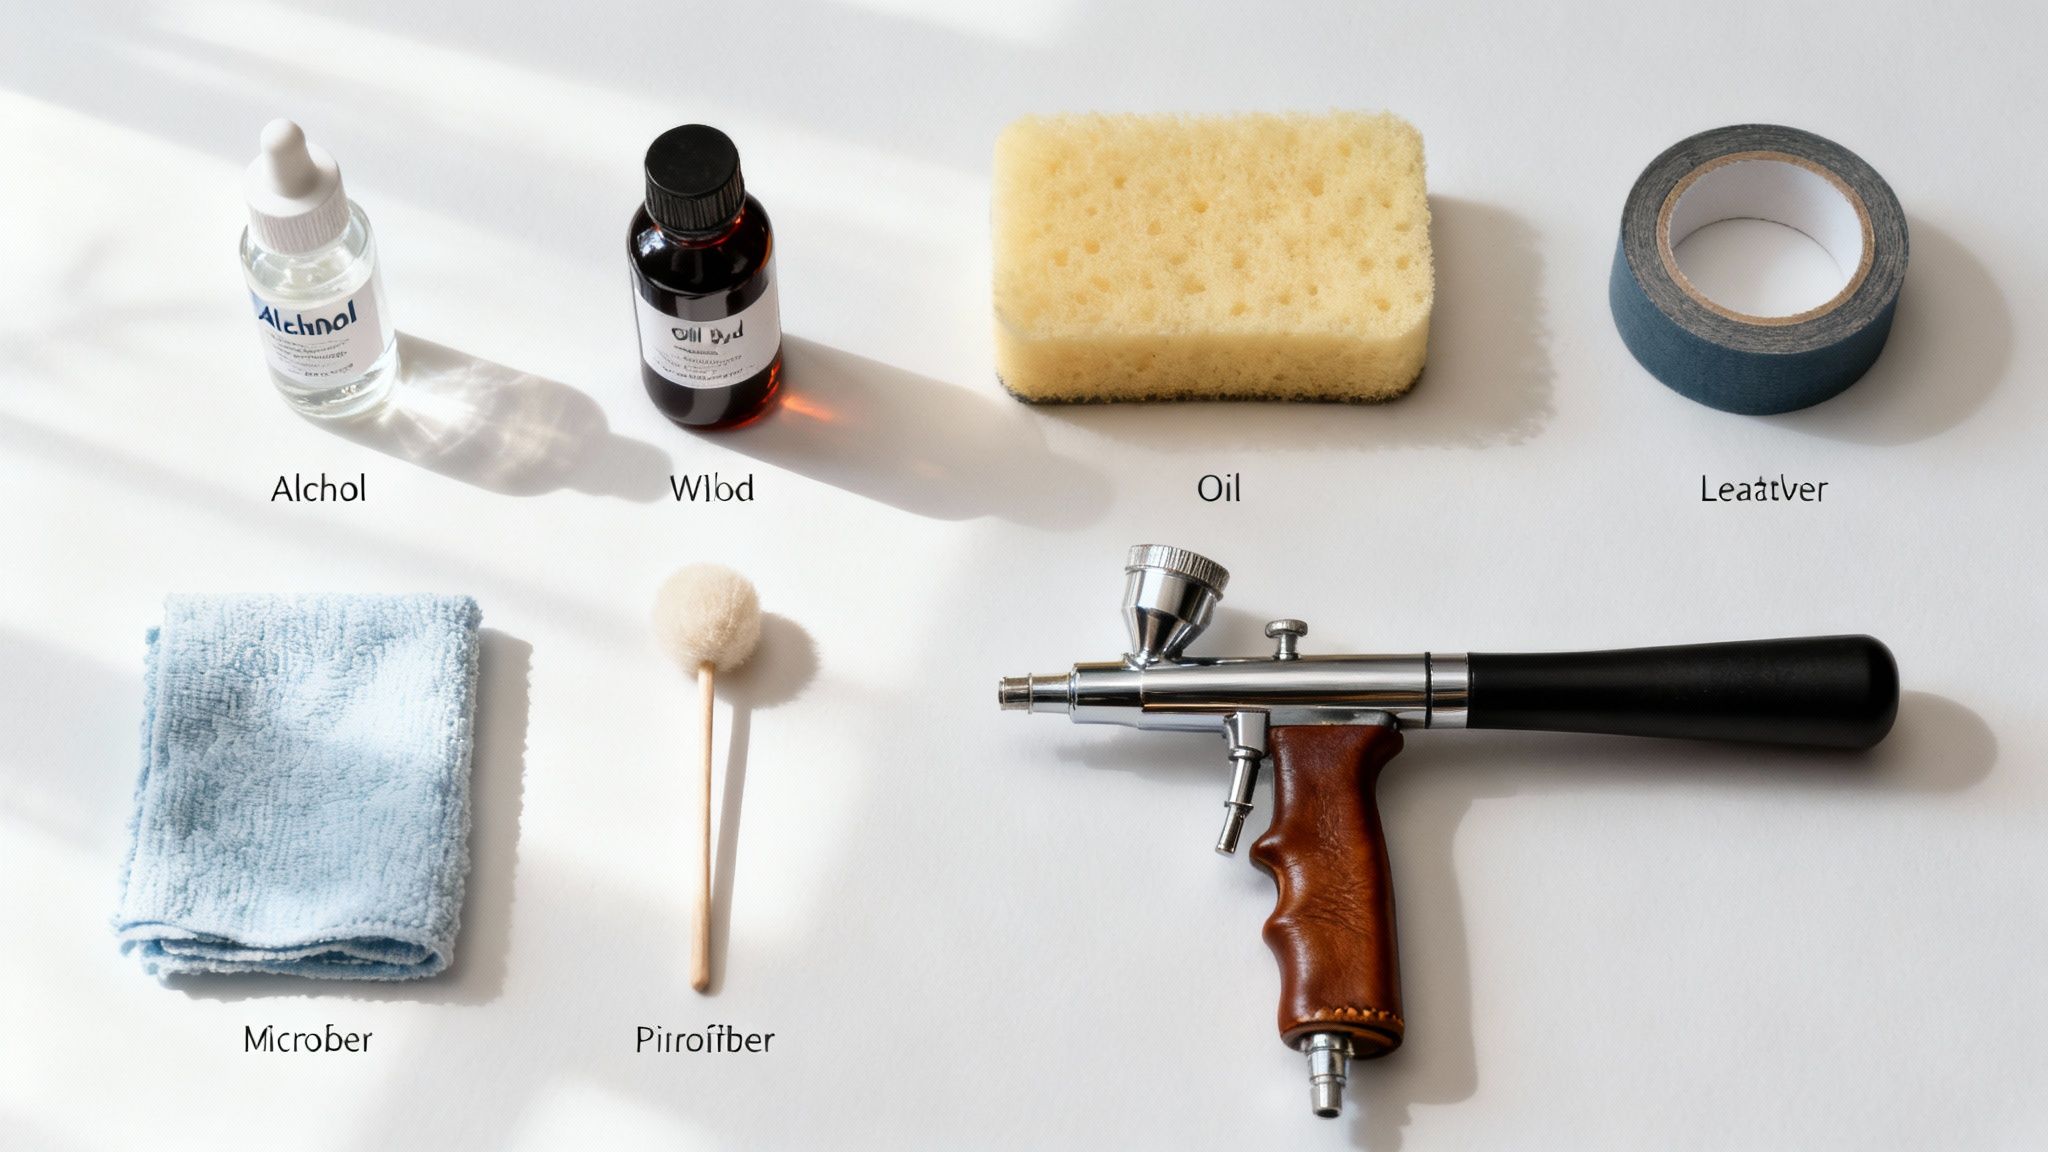
Your Essential Leather Dyeing Toolkit
Before you dive in, gathering all your tools and materials is key. Having everything ready to go will make the whole process smoother and more successful from start to finish.
| Item | Purpose | Pro Tip |
|---|---|---|
| Leather Dye | To color the bag. | Oil-based dyes penetrate deeper, while water-based ones are easier to clean up. |
| Leather Preparer/Deglazer | Removes the original factory finish so the new dye can soak in. | Don't skip this! It's the most critical step for an even, lasting color. |
| Wool Daubers or Sponges | For applying the dye evenly. | Use daubers for small areas and sponges for larger surfaces to avoid streaks. |
| Clean, Lint-Free Cloths | For cleaning, applying deglazer, and buffing. | Microfiber cloths work great. Have several on hand. |
| Leather Conditioner | Restores moisture to the leather after dyeing to keep it soft. | Apply this before sealing to nourish the leather. |
| Leather Sealer/Finish | Protects the new color from rubbing off and adds a protective layer. | Choose a matte, satin, or gloss finish to get the look you want. |
| Painter's Tape | To protect hardware, zippers, and areas you don’t want to dye. | Press the edges down firmly to prevent any dye from bleeding underneath. |
| Disposable Gloves | To protect your hands from stains. | Leather dye is potent and can be very difficult to get off your skin. |
| Drop Cloth or Newspaper | To protect your workspace from spills. | This project can get messy, so cover your area well. |
Having this toolkit assembled means you’re ready to tackle the project with confidence.
Why This Skill Matters
In fashion today, customization is everything. The ability to dye your own leather bag taps right into the trend of valuing durable, artisanal pieces. The global handbag market was valued at $56.48 billion in 2024 and is expected to hit $81.79 billion by 2030, with unique, high-quality leather goods driving much of that growth. By dyeing your own bag, you're embracing a tradition of craftsmanship that makes every piece feel special.
A successful dye job is 90% preparation and 10% application. Taking the time to properly clean and strip the old finish is the single most important factor for achieving a flawless, professional-looking result that lasts.
And if you want to get even more creative, changing the color is just the beginning. For a truly unique look, you could explore other methods like adding custom prints to leather items, which lets you apply intricate designs and graphics.
Ultimately, this project is about more than just a new color—it’s about empowerment. It’s about taking something you already own and making it even better. By the time you finish this guide, you won’t just know the steps; you’ll have the confidence to completely transform your bag.
Choosing the Right Leather Dye and Tools
Honestly, this first step is where the magic happens. The success of your entire project rests on picking the right products for your specific bag. You wouldn't use watercolor on an oil canvas, right? It's the same idea here—different leather types and the look you want call for different dyes and tools. Making the right choice now will save you a world of headaches later on.
Think of leather dyes as falling into a few main categories, each with its own personality. Your bag's material and the vibe you're going for will point you to the perfect match.
Understanding Different Leather Dyes
Not all dyes are created equal. Their chemical makeup has a huge impact on the final result, and it's worth knowing the difference.
For instance, alcohol-based dyes are famous for their vibrant, punchy colors and they dry super fast. They really get into the leather's surface for a color that lasts. The only catch is that the alcohol can strip some natural oils, so you'll definitely need to condition it well afterward to prevent it from feeling stiff.
Then you have oil-based dyes, which are much gentler. They soak deep into the leather fibers, conditioning as they color, leaving you with a rich, supple finish and deep, beautiful saturation. This is often the go-to for high-quality bags because it really enhances the leather's natural beauty.
Finally, there are water-based dyes. These are a more eco-friendly option with fewer fumes. They tend to produce more muted, subtle tones compared to the others, which makes them perfect for getting that gorgeous antique or rustic look.
Matching the Dye to Your Bag
The single most important factor here is the type of leather your bag is made from. Is it a smooth, finished top-grain leather, or a more porous, raw vegetable-tanned hide?
Finished leathers usually have a protective coating that you’ll need to remove before dyeing. Unfinished leathers, on the other hand, will drink up dye like a sponge. For a deep dive into figuring out your bag’s material, our guide on what is top-grain leather is a fantastic resource.
Here’s a quick cheat sheet to help you decide:
- For Vibrant, Bold Colors: An alcohol-based dye is your best bet. It will deliver that pop of color you’re looking for, especially on lighter-colored leathers.
- For Deep, Rich Tones: Opt for an oil-based dye. It gives a luxurious, deeply saturated color while keeping the leather soft and flexible.
- For an Understated, Earthy Look: Water-based dyes are perfect. They provide a softer, more natural appearance.
Selecting the Right Application Tools
Your choice of applicator is just as important as the dye itself. It directly influences the texture and evenness of the finish, and the right tool just makes the job so much easier.
Wool Daubers These are the go-to for most DIY projects. The soft, absorbent wool holds a good amount of dye and gives you great control, especially when working in small, circular motions. They’re perfect for structured satchels and getting into detailed areas.
Sponges A high-density sponge is excellent for large, flat surfaces, like on a tote bag. It helps you apply a thin, even coat quickly. Sponges are also great for creating a slightly textured or mottled effect if that’s the style you want.
Airbrush If you want the most uniform, factory-like finish, nothing beats an airbrush. It mists the dye onto the surface, which completely eliminates any chance of streaks or brush marks. It does take a bit more setup and practice, but the results can be absolutely stunning.
Choosing your supplies thoughtfully is the foundation of a successful project. By matching your dye and tools to your specific bag, you set yourself up for a beautiful transformation you'll be proud of.
Getting Your Bag Ready for a Flawless Finish
Honestly, this is the most critical part of the whole process. If you get this wrong, nothing else will matter. Think about it like painting a room—you wouldn't just slap a new coat of paint over a dirty, glossy wall, right? It’s the same concept here. Proper prep is what creates a professional, lasting finish.
Skipping this step is the fastest way to get a blotchy, uneven mess that will probably just rub off on your clothes later. The goal is to create a perfectly clean, porous surface so the leather can soak up the new color evenly. This boils down to two key jobs: stripping off the old finish and carefully protecting all the parts you don't want to dye.
Stripping the Factory Finish
Every bag you buy from a store comes with a factory sealant. It’s a protective topcoat designed to fend off stains and moisture, which is great for daily use but a huge roadblock for dyeing. Your new dye has to get into the leather itself, not just sit on top of that invisible barrier.
To get it off, you'll need a product called a leather preparer or deglazer. It's basically a strong solvent that safely strips away that original finish, along with any built-up oils, waxes, or grime.
Make sure you're in a well-ventilated area, then follow these steps:
- First things first, put on your gloves to protect your skin.
- Apply a good amount of deglazer to a clean, lint-free cloth.
- Working in small, circular motions, rub the bag firmly. You’ll start to see the old color and finish coming off onto the cloth—that's how you know it's working.
- Keep going until you’ve done the entire bag. The leather should feel a bit dull and maybe even slightly tacky. That’s the sign that the finish is gone and you’re ready.
If you have some stubborn old spots that the deglazer won't lift, you might need to get a bit more specific. Our guide on how to remove stains from leather has some extra tricks for handling tough blemishes before you dye.
Pro Tip: Don't panic if the leather looks a little faded or uneven at this point. That's exactly what you're aiming for. A perfectly prepped surface looks stripped down and ready for its makeover.
Masking Off Hardware and Lining
Once the bag is stripped clean, it’s time to protect all the bits and pieces that aren't getting a color change. A single drop of dye on a shiny brass buckle or the interior lining can be a nightmare to remove. This is where you need to be patient. Grab some painter's tape.
Carefully tape over all the metal hardware, like:
- Zippers and their pulls
- Buckles, clasps, and rings
- Brand logos or nameplates
- Any decorative studs or rivets
Press the edges of the tape down firmly to create a tight seal. You don't want any dye sneaking underneath. To protect the inside, just stuff the bag with plastic wrap or some old newspaper to catch any potential drips.
The All-Important Patch Test
I can't stress this enough: always do a patch test before you dive into dyeing the whole bag. The color you see in the bottle is almost never the exact shade it will be once it dries on your particular piece of leather. A quick test now can save you a world of regret later.
Find a hidden spot on the bag to do your test. The inside of a pocket, the underside of a strap, or a small area on the bottom are all perfect choices. Apply a little bit of dye, let it dry completely, and then dab on a touch of the sealer.
This simple test does two crucial things: it shows you the true final color, and it confirms the dye is absorbing correctly into the prepped leather. If you love how it looks, you’re officially ready for the fun part—bringing your bag's new color to life.
Mastering the Art of Dye Application
With your bag prepped and ready, the real transformation begins. Applying dye is more of an art than a science, and it calls for a patient, steady hand. The secret to that flawless, straight-from-the-factory finish isn't about speed or slapping on a thick coat. It's all about control, consistency, and building up color with thin, deliberate layers.
Forget any notion of getting this done in one go. A single, heavy coat is a surefire way to get streaks, uneven patches, and a cheap, painted-on look. To get professional results when you dye a leather bag, you have to think like a seasoned artisan. Focus on light, methodical application, letting each thin layer build up the rich, deep color you're aiming for.
Choosing Your Application Technique
The tool you pick really guides your whole technique. Whether you have a classic wool dauber or a sponge, the motion you use is what makes or breaks an even finish.
For a smooth leather bag, a wool dauber is usually your best bet. Here’s how to approach it:
- Lightly dip the dauber into your dye, then blot the extra on the side of the container. You want it damp, not dripping wet.
- Always start on a less-seen spot, like the bottom of the bag, just to get a feel for how the dye flows.
- Use light, overlapping circular motions to apply the dye. This is key for blending the edges of each pass and avoiding those awful "tide marks" or streaks that can ruin a project.
If you're tackling a larger bag or one with a pebbled texture, a high-density sponge can make the job much easier. The trick here is to use a gentle dabbing motion, not a wiping one. Wiping will cause the dye to pool in the little crevices of the texture, creating ugly dark spots. A soft dab, on the other hand, deposits color evenly across the entire surface.
The number one mistake I see is trying to get full color on the first pass. Your only goal for that initial layer is to establish a light, even base. The true depth and richness will come from the layers that follow.
The Rhythm of Dyeing Coats and Drying
Patience is honestly your most valuable tool right now. Leather dye, particularly alcohol-based formulas, dries surprisingly fast. This means you have to work efficiently, moving from one section to the next without pausing too long in any one spot. It helps to work in logical panels—do the front, then the back, then the sides—blending everything seamlessly as you go.
After that first thin coat is on, you absolutely must let the bag dry completely. Rushing this step is a recipe for a do-over. Applying a second coat to still-damp leather will just lift the first layer right off, leaving you with a blotchy, muddy mess.
Drying time can change based on a few things:
- Type of Dye: Alcohol-based dyes might feel dry to the touch in under an hour, while oil-based ones can take several hours.
- Humidity: If it's a humid day, expect the drying process to slow down considerably.
- Airflow: A room with good ventilation will help the dye evaporate and cure much faster.
As a solid rule of thumb, give it at least 2-4 hours between coats. Honestly, letting it sit overnight is even better. When you touch a hidden spot, it should feel totally dry, with no coolness or tackiness at all.
Building Up to Your Final Color
Once that first coat is bone-dry, you can go in with your second. Use the exact same technique you did before—light, overlapping circles with the dauber or gentle dabs with the sponge. You’ll start to see the color really deepen and even out with this second application.
Most projects will need somewhere between three to five thin coats to get that truly uniform, saturated color. Each layer works to fill in any tiny inconsistencies from the one before it, building up to a perfect finish. The best part of this method is the control it gives you; you can simply stop whenever you hit the shade you love.
And dyeing is just the beginning! If you want to get truly creative, you can explore other ways to make your leather unique. For a standout piece, consider adding intricate designs through services that create custom hand-painted and branded leather items. This takes personalization to a whole new level, turning your bag into a piece of wearable art.
Remember, the goal is to stain the leather, not paint it. Each layer should be a transparent wash of color that becomes one with the layer beneath it. Once you’re happy with the depth of color and the final coat is completely dry, you’re ready for the last, crucial step: sealing your beautiful work.
How To Seal and Condition Your Newly Dyed Bag
You’ve done the hard work, and your bag is finally showing off its gorgeous new color. But hold on—the project isn’t quite finished. Applying the dye is only half the battle. The final steps, sealing and conditioning, are what truly protect your masterpiece, lock in the color, and bring back that supple, luxurious feel that makes leather so irresistible.
Think of a leather finisher as a clear topcoat for your bag. Its main job is to create an invisible shield over the fresh dye. Without this crucial layer, the color you so carefully applied could rub off on your clothes, fade unevenly, or get ruined by minor scuffs and spills. This step is what turns a DIY project into a durable, everyday accessory.
Choosing The Perfect Leather Sealant
The sealant you choose has a huge impact on the final look and feel of your bag, so it’s worth picking one that matches your new style. You’ll usually find sealants in a few different finishes, each giving a totally different vibe.
- Matte Finish: This gives a flat, non-reflective look that’s perfect for a more modern, understated style. It seals the color without adding any shine.
- Satin or Neutral Finish: Offering a subtle, gentle sheen, this is often the most popular choice. It beautifully mimics the natural luster of most new leather goods, giving a professional, straight-from-the-store look.
- High-Gloss Finish: If you want your bag to have a patent leather-like shine, a high-gloss finisher is the way to go. It creates a highly reflective, durable surface that really makes the color pop.
When you dye a leather bag, the right sealant doesn't just protect the color—it completes the whole transformation. So, be sure to choose the finish that brings your vision to life.
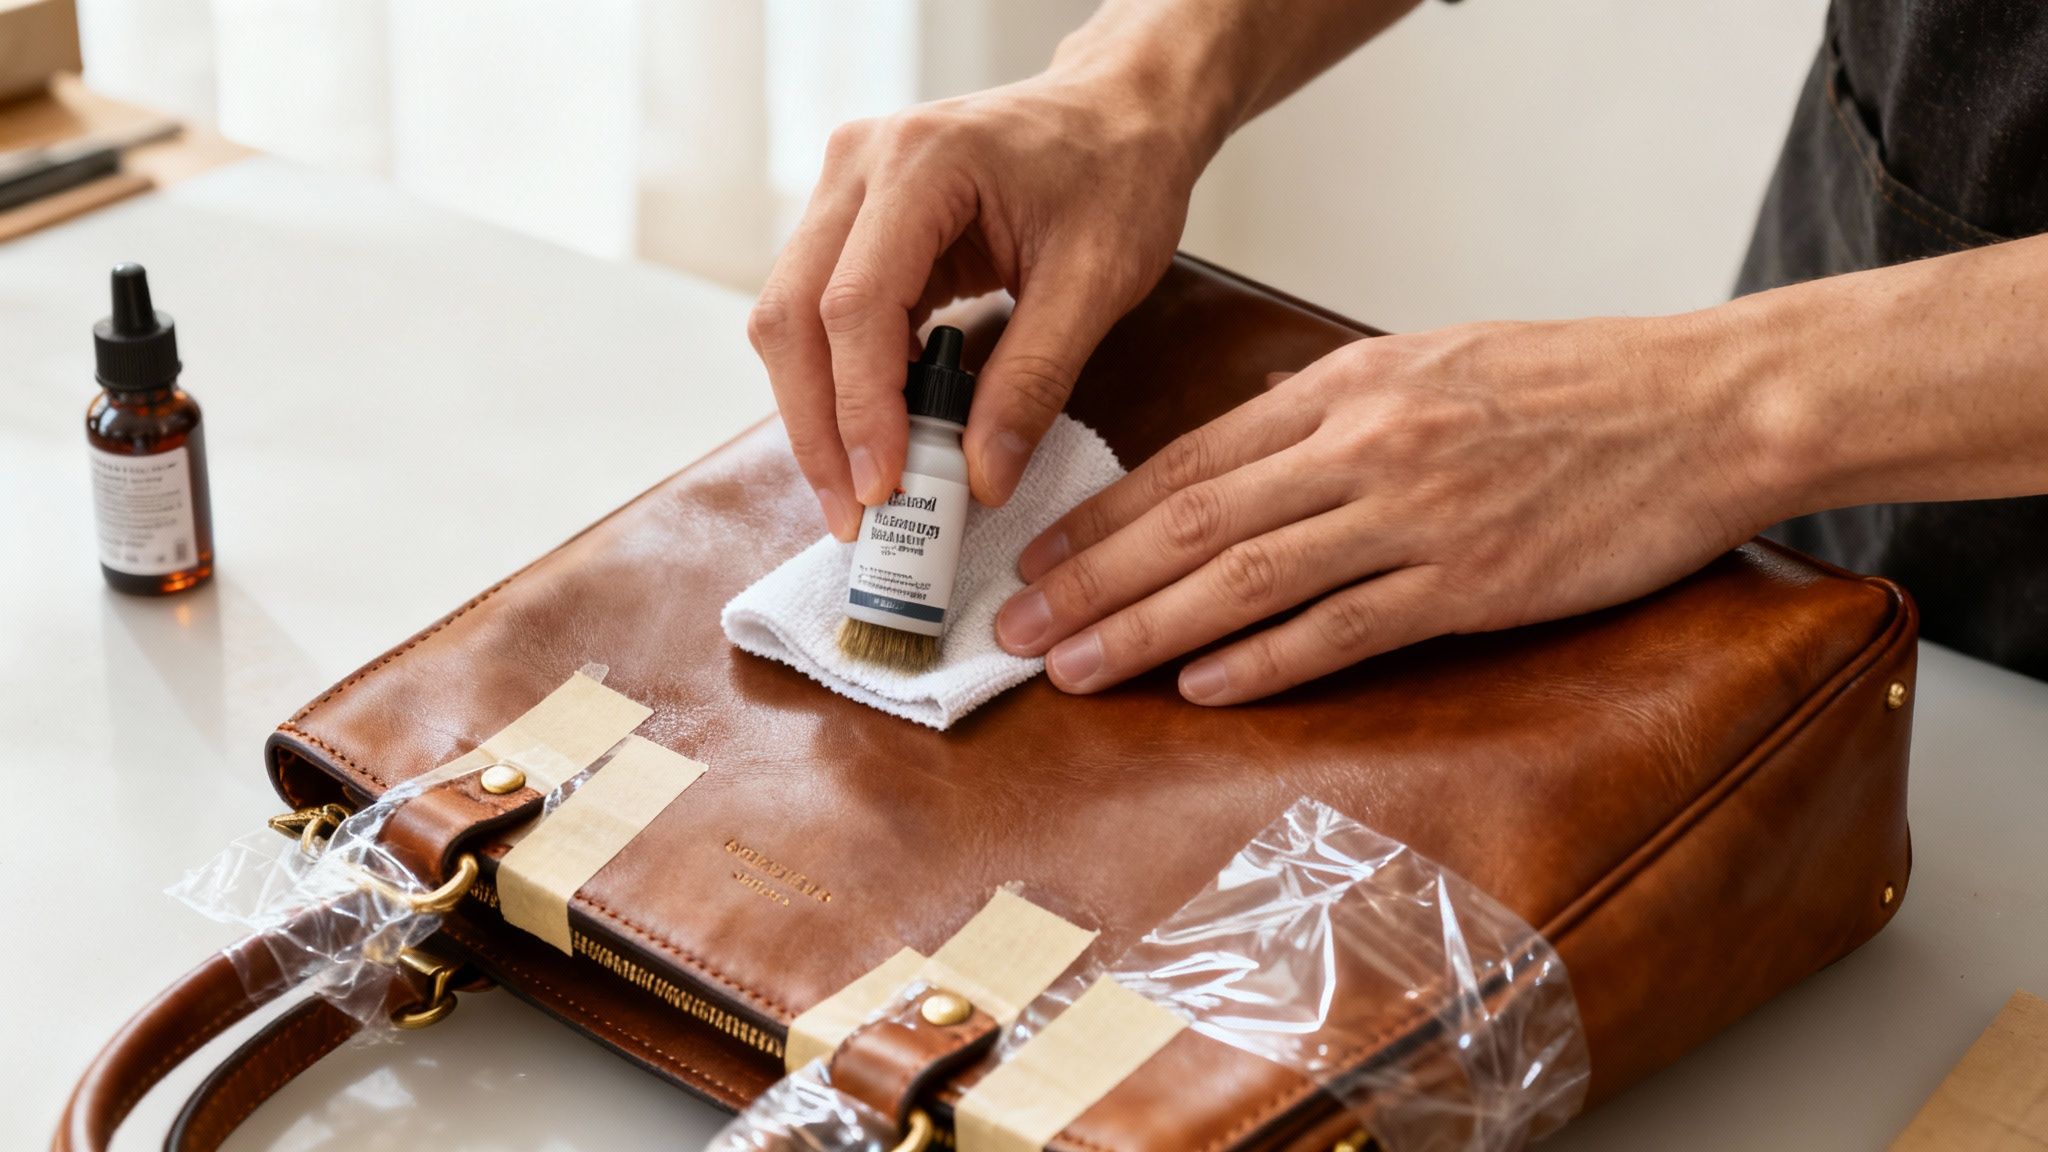
Applying The Finisher for Lasting Protection
Once you have your sealant, the application process is pretty straightforward but requires the same gentle touch you used with the dye. You’ll want to apply it with a clean, soft, lint-free cloth or a fresh high-density sponge.
Pour a small amount of the sealant onto your applicator, not directly onto the bag itself. Using long, even strokes, apply a very thin coat across the entire surface. Just like with the dyeing process, it’s always better to apply two or three light coats than one thick, heavy one. A thick application can get sticky and even crack over time.
Let each coat dry completely before applying the next, which usually takes about an hour (but always check the product’s instructions). After the final coat is on, let the bag cure for at least 24-48 hours in a well-ventilated area before you even think about using it. This curing time is non-negotiable; it lets the sealant fully harden into a tough, protective shell.
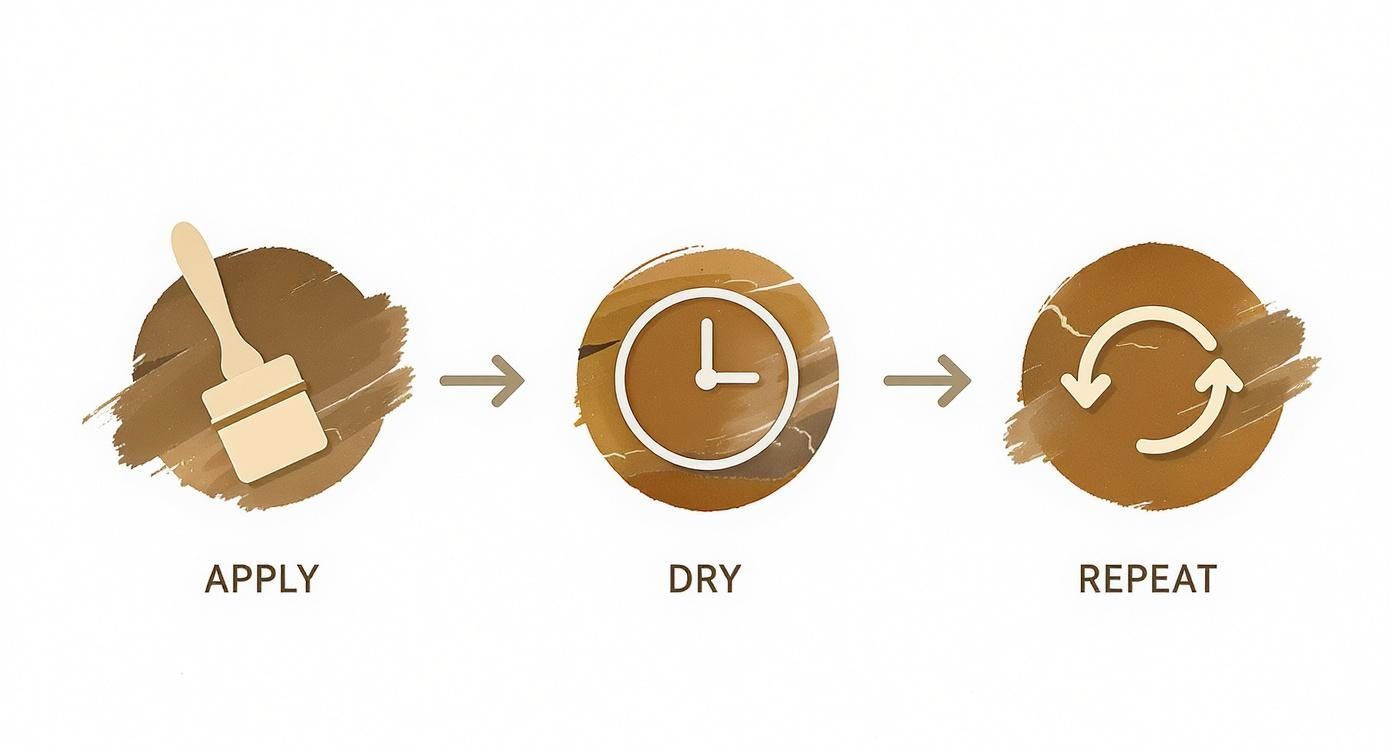
This simple, patient cycle of applying, drying, and repeating is the secret to getting a deep, even color and a durable finish that will last.
Restoring Moisture with a Quality Conditioner
The dyeing and sealing process, especially if you used an alcohol-based dye, can strip some of the natural oils from the leather, leaving it feeling a bit stiff or dry. The final touch is to bring that moisture back with a high-quality leather conditioner.
After your sealant has fully cured, apply a small amount of conditioner with another clean cloth. Work it into the leather in gentle, circular motions. Let it sit for about 20-30 minutes so the leather can soak up all the nutrients, then take another clean cloth and buff off any excess. This step revitalizes the leather, restoring its flexibility and that soft, supple feel.
To find the right product for your bag, check out our guide on the best leather conditioner for handbags.
By following these final steps, you ensure your beautifully dyed bag is not only visually stunning but also healthy, protected, and ready to be shown off for years to come.
Your Top Questions About Dyeing a Leather Bag
Jumping into a DIY project like this always sparks a few questions. Getting the right answers upfront is the best way to build your confidence and sidestep those common little disasters. We've gathered some of the questions we hear most often about dyeing a leather bag and are here to give you the straight-up, practical advice you need.
From what’s possible with color to what happens with your warranty, knowing these details before you start will help you set realistic goals for a much smoother, more successful project.
Can I Dye a Black Bag a Lighter Color?
This is easily the number one question, and the honest answer is almost always no—at least not if you're doing it yourself at home. Leather dyes are translucent. They're designed to sink into the leather and add to its existing color, not to cover it up like a coat of paint. Imagine trying to use a yellow highlighter on black paper; the black just swallows the color.
If you try to put a light dye like beige or white over a black bag, you'll see little to no difference at all. To make that kind of drastic change, the original black finish would have to be stripped off with harsh, industrial-grade chemicals before a special opaque pigment could be applied. It's a massive job.
The golden rule for any DIY leather dyeing project is simple: you can always go darker, but you can almost never go lighter. Taking a tan bag to a rich chocolate brown? A perfect project. Trying to turn a navy bag into a pastel pink? That’s a job for the specialists.
Keeping this in mind is the key to choosing a project you’ll actually be happy with.
Will Dyeing My Bag from The Bag Icon Void My Warranty?
Yes, it will. Any time you alter your bag from The Bag Icon with third-party chemicals—that includes leather dyes, preparers, and sealants—it's considered a modification that voids our warranty. The warranty is there to cover any issues that might pop up from the original manufacturing and materials.
When you dye a bag, you're fundamentally changing the chemical makeup of the leather. After that, it becomes impossible for our team to know if an issue like peeling or cracking is due to a manufacturing defect or if it was caused by the dyeing process.
If you've fallen out of love with the color of your bag, we suggest a few other options:
- Reach out to our customer service team. We can recommend professional refinishing partners we trust.
- Browse our collection for a similar style that already comes in the color you want.
- Ask about a custom order request if that’s an option for the style you love.
How Do I Care for My Bag After Dyeing It?
Taking good care of your bag afterward is crucial for protecting all your hard work and keeping that new color looking fresh. The most important first step is just being patient. Let that final sealant coat cure completely for at least 24 to 48 hours before you even think about using the bag.
Once it’s fully cured and ready for its debut, stick to a simple care routine:
- Dust It Off: Once a week, give the bag a quick wipe with a dry microfiber cloth to get rid of any surface dust.
- Clean Up Spills: For small spills, gently blot the spot with a slightly damp cloth, then immediately dry it with another clean, dry cloth.
- Keep It Conditioned: Every three to six months, work in a quality leather conditioner. This puts essential moisture back into the leather, keeping it supple and preventing cracks. Just use a small amount, let it soak in for about 20 minutes, then buff off any extra with a clean cloth.
And last but not least, always tuck your newly dyed bag into its dust bag when you’re not using it. Keep it out of direct sunlight, too, because harsh UV rays can make even the best dyes fade over time.
What Happens If I Get Dye on the Hardware or Lining?
Oops moments happen, but acting fast is your best bet. If you get a smear of dye on the metal hardware, don't sweat it. Just grab a cloth with a little rubbing alcohol on it and wipe it away immediately. As long as you catch it before it dries, the dye should come right off a non-porous surface like metal.
The fabric lining, however, is a different story. Fabric is absorbent and will soak up the dye almost instantly. You can try blotting the stain with a fabric spot remover, but you absolutely have to test it on a hidden area of the lining first to make sure it doesn't bleach or discolor the material.
This is exactly why that initial prep work is so important. Spending an extra 20 minutes carefully taping off every buckle, zipper, and stud, and protecting the lining, is truly one of the most critical steps for getting a clean, professional finish.
Ready to find your next favorite accessory without the DIY? At The Bag Icon, we believe luxury should be accessible. Explore our collection of high-quality, beautifully crafted leather handbags designed for the modern woman. Find your perfect bag today at The Bag Icon.


Comments